Supplement Editor Guide
Complete documentation for creating compliant supplement facts panels.
The Supplement Editor is a powerful tool designed to make creating compliant supplement facts panels easy. This guide covers all editor features, popup controls, and best practices.
Getting Started
Accessing the Supplement Editor
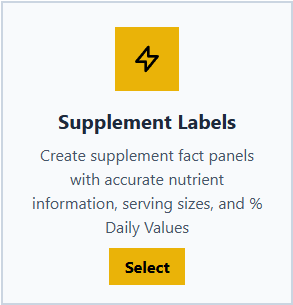
To access the Supplement Editor, click the "Start Making Labels" button from the homepage and select "Supplement Labels":
Guest vs. Logged-In Users
When you first visit the Supplement Editor, you'll see a notice explaining the difference between guest and logged-in access:
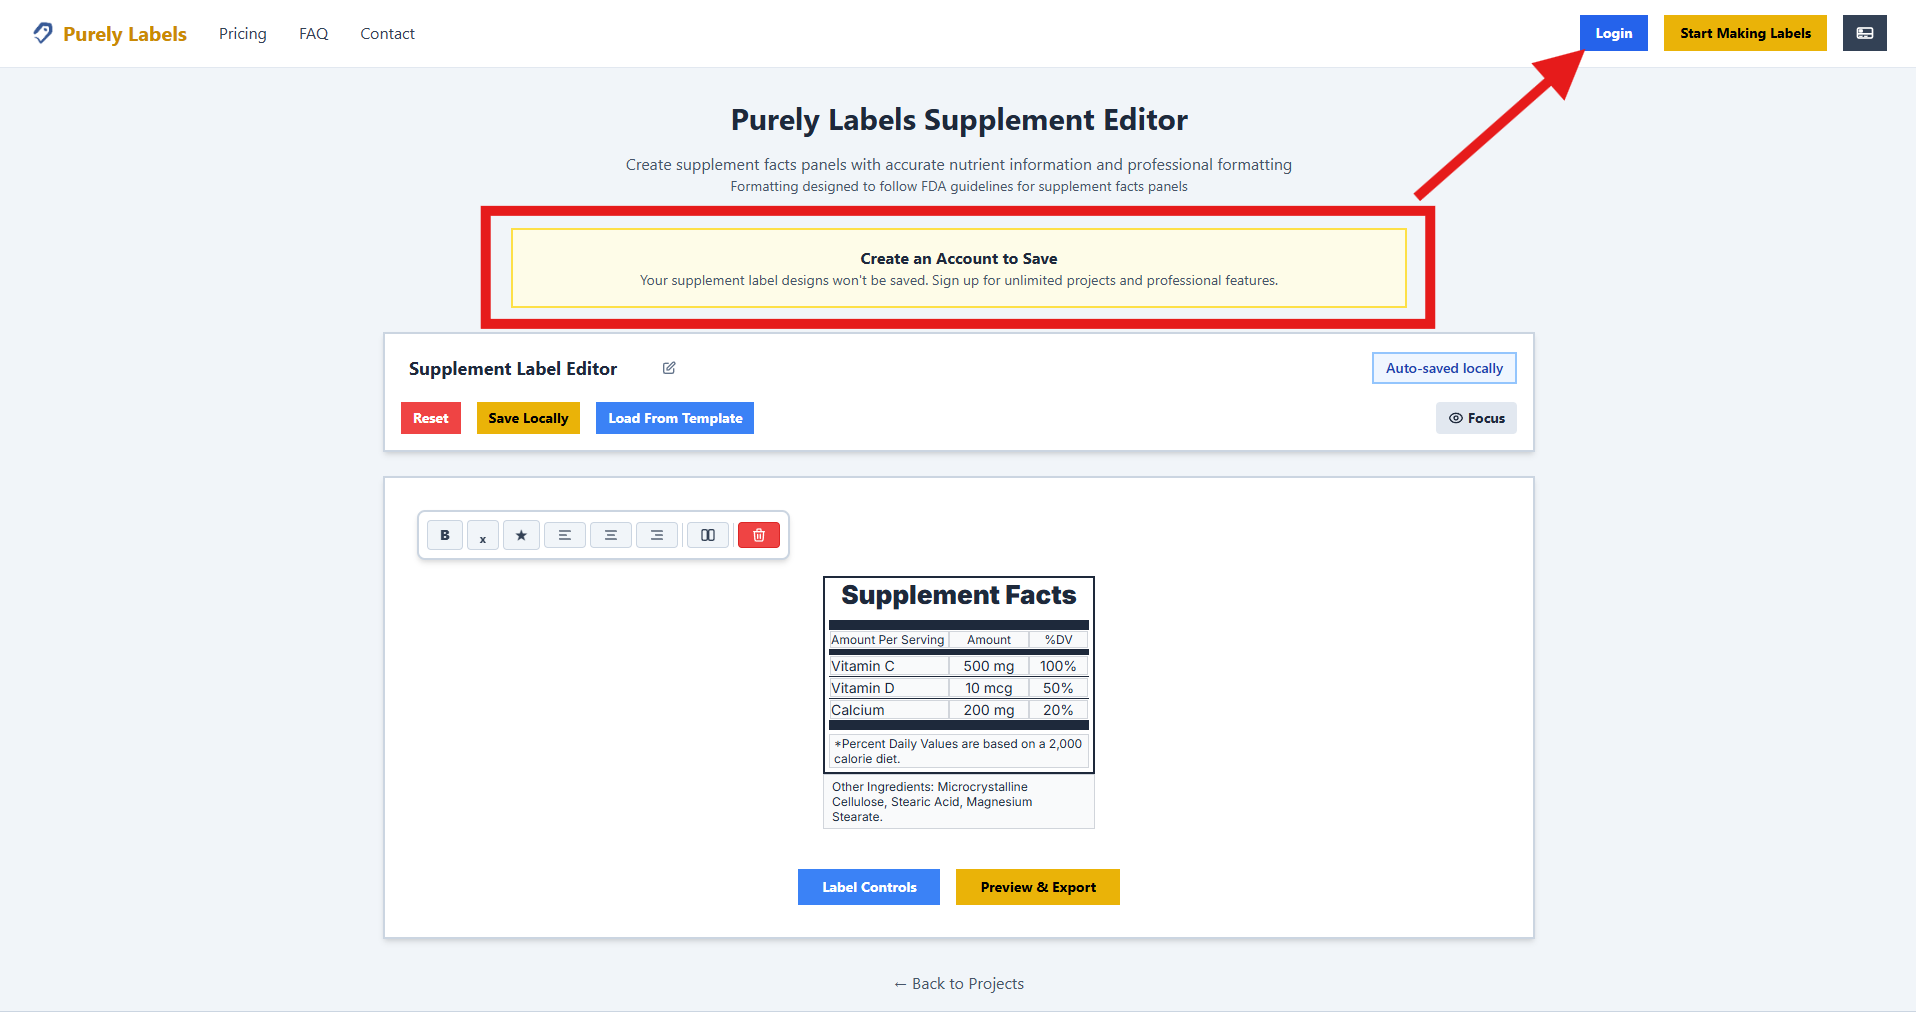
Guest Users: As a guest, you can save one project locally in your browser. This means your work is stored on your current device and browser only. If you clear your browser data or switch devices, your project will be lost.
Logged-In Users: Creating an account and logging in ensures your projects are saved to our server. This means you can access your work from any device, and you won't lose your progress if you clear your browser data.
Saving Your Work as a Guest
If you're using the editor as a guest, you can save your project locally by clicking the "Save Locally" button:
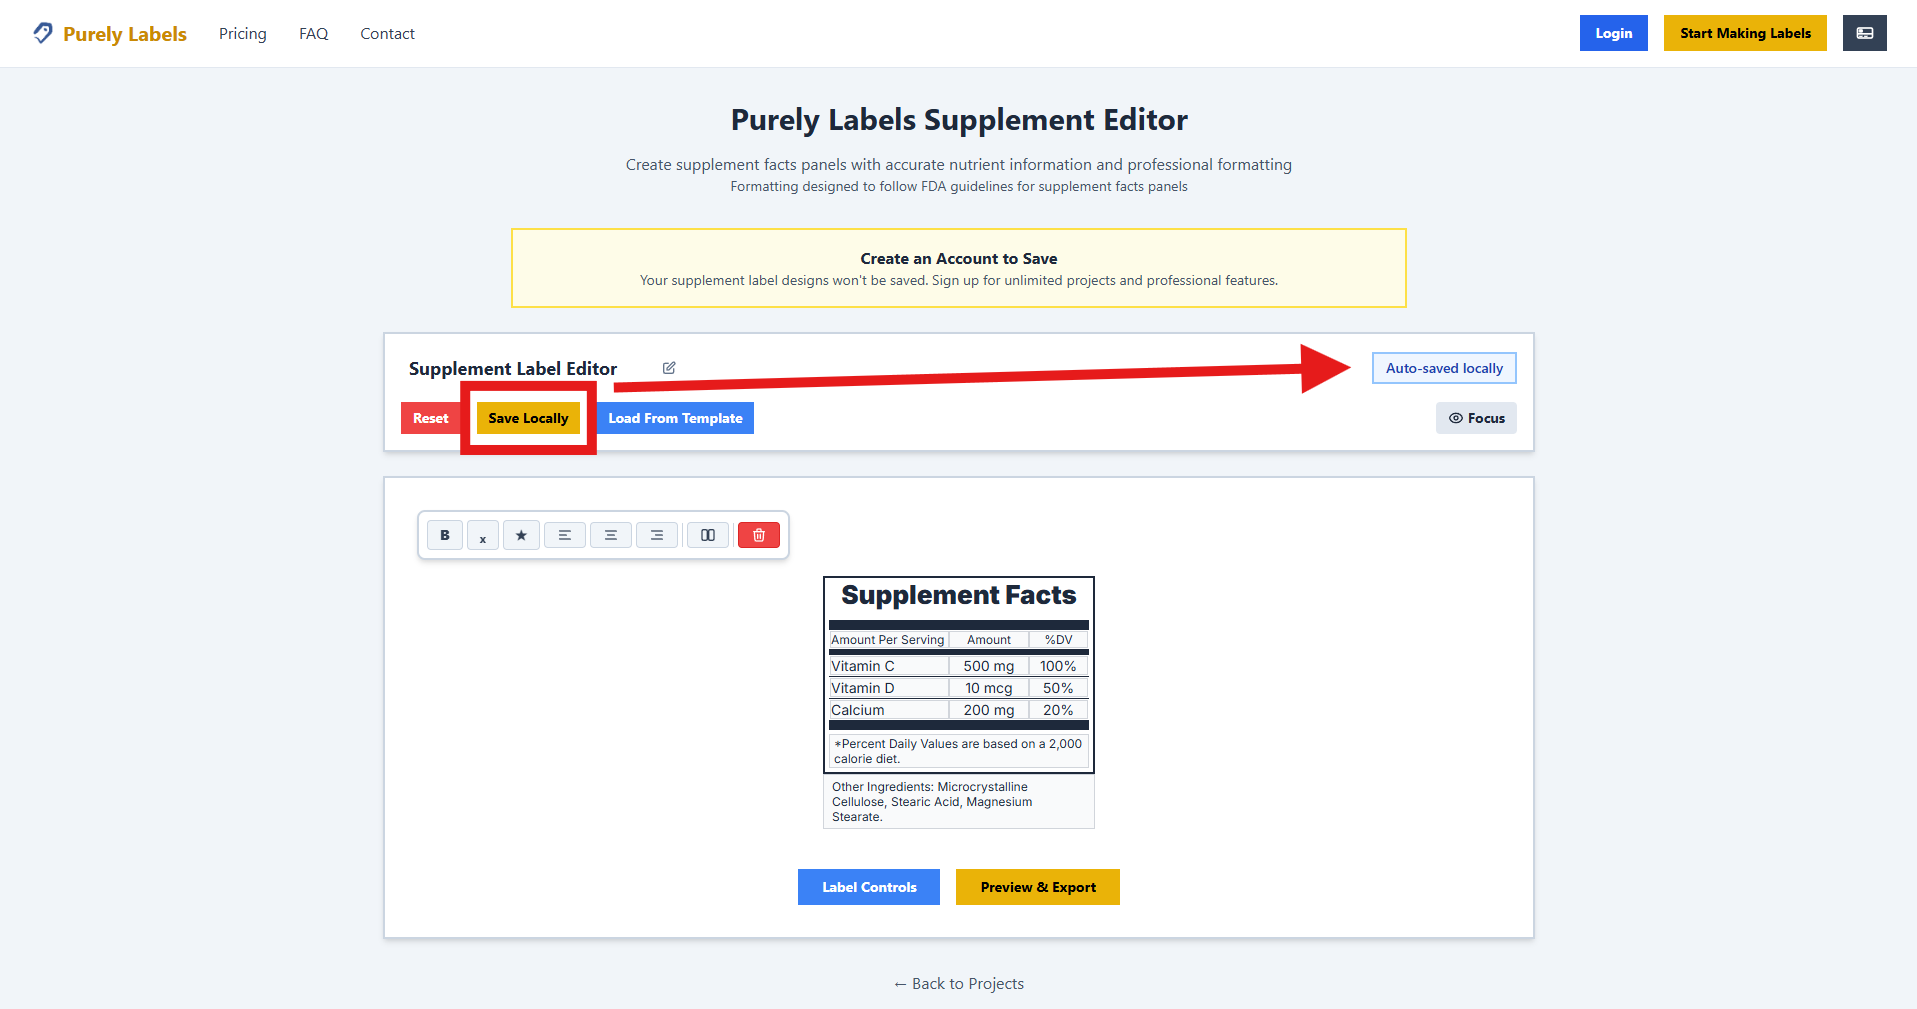
After clicking "Save Locally", you'll see a confirmation message indicating your project has been saved. When you return to the Supplement Editor page, your last saved project will automatically reload, allowing you to continue where you left off.
Important: Remember that local saves are tied to your specific browser on your current device. For the best experience and to ensure you never lose your work, we recommend creating a free account.
Using the Editor
Focus Mode
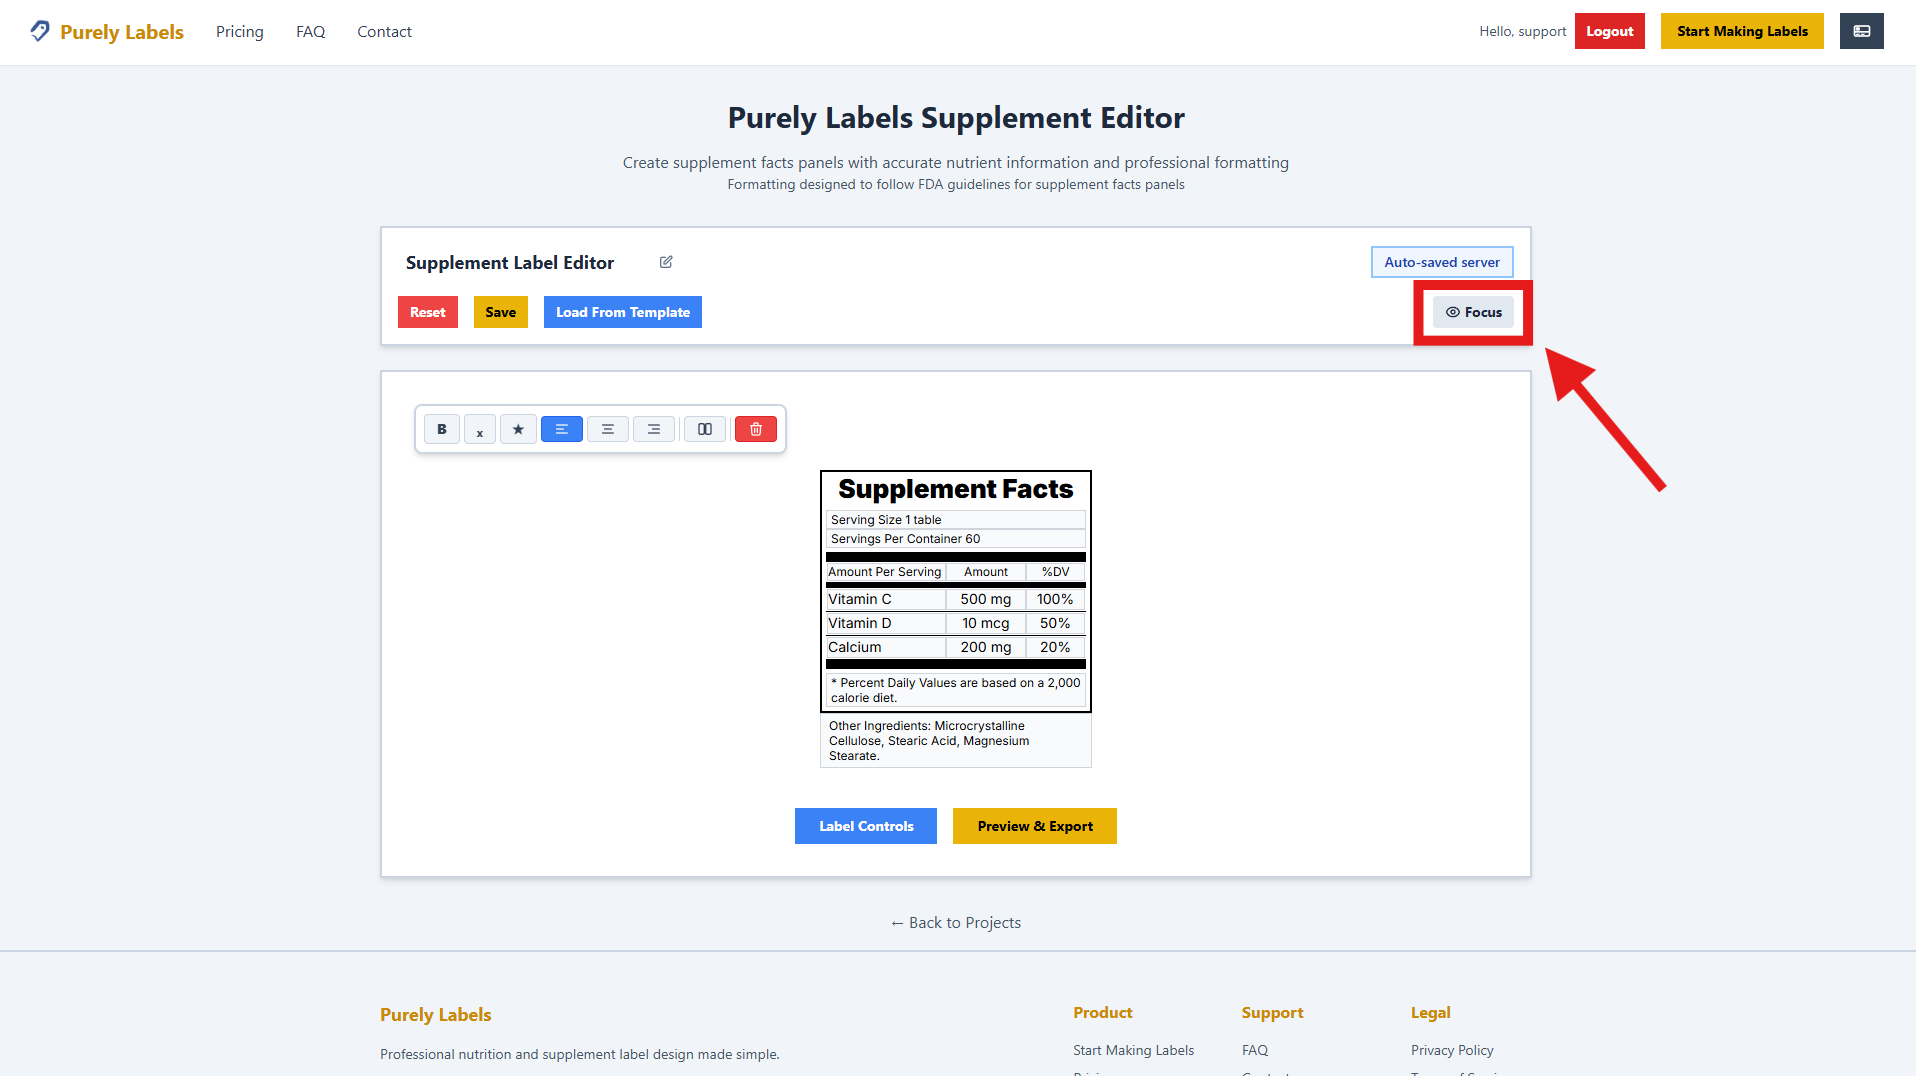
The Supplement Editor includes a Focus Mode feature that helps you concentrate on your label by hiding distracting elements. This gives you a cleaner, more streamlined workspace.
Before Focus Mode:
After Focus Mode:
When Focus Mode is enabled, the interface elements fade into the background, allowing you to focus entirely on your label design. You can toggle Focus Mode on and off as needed while working on your project.
Saving Your Project
The editor provides easy access to save your work. Click the "Save" button to store your current project:
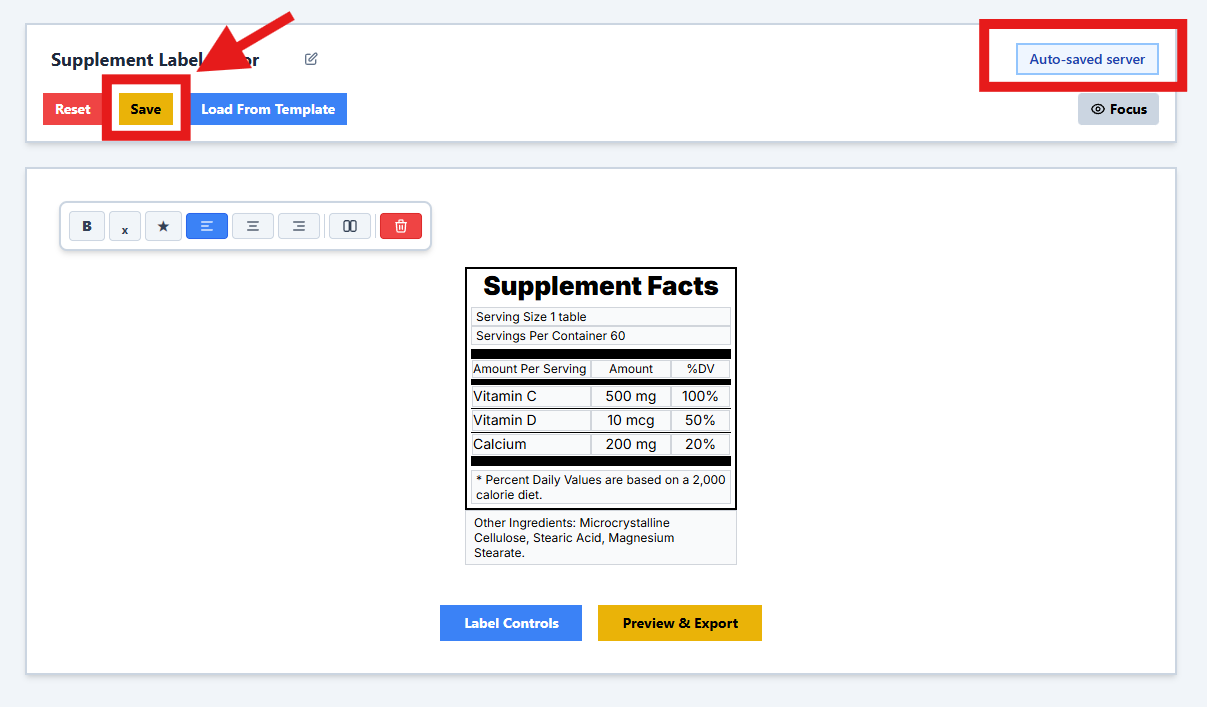
For guest users, this saves your project locally in your browser. For logged-in users, your project is saved to our server and can be accessed from any device.
Resetting Your Label
If you want to start fresh, you can reset your label to its default state using the Reset button:
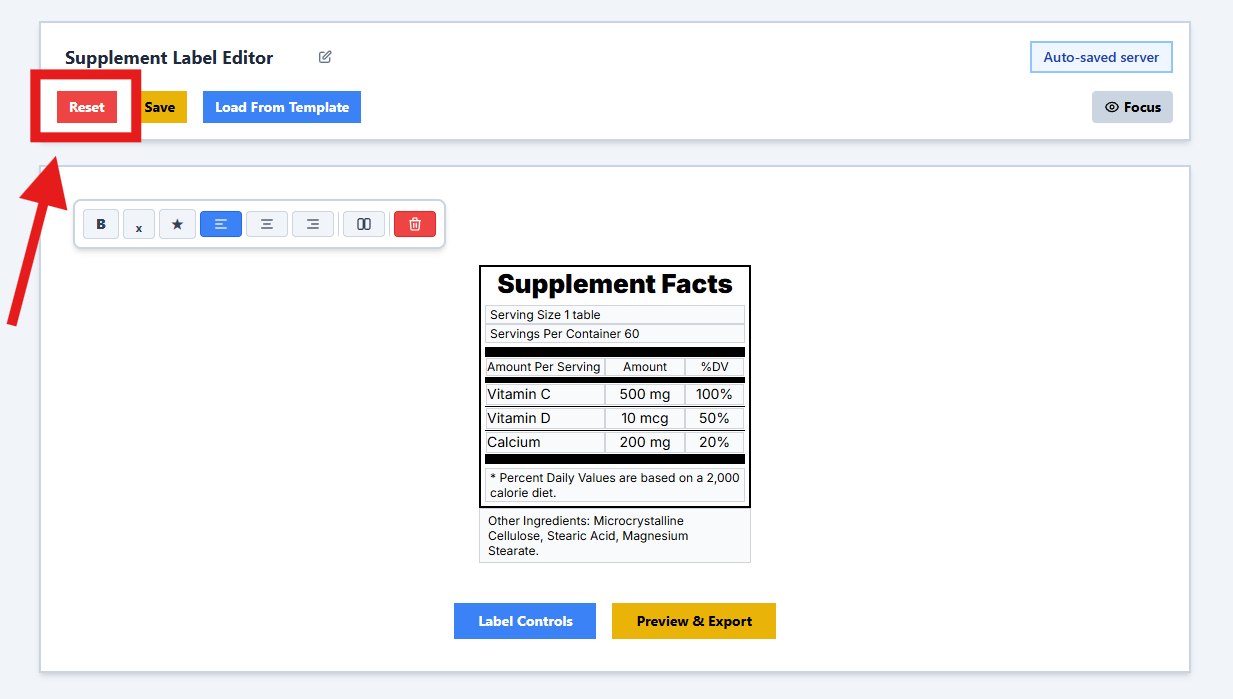
The Reset function clears all your current work and returns the label to a blank template. Use this when you want to start over with a clean slate.
Loading Templates
The Supplement Editor offers a variety of pre-designed templates to help you get started quickly. Click the "Load Template" button to browse available options:
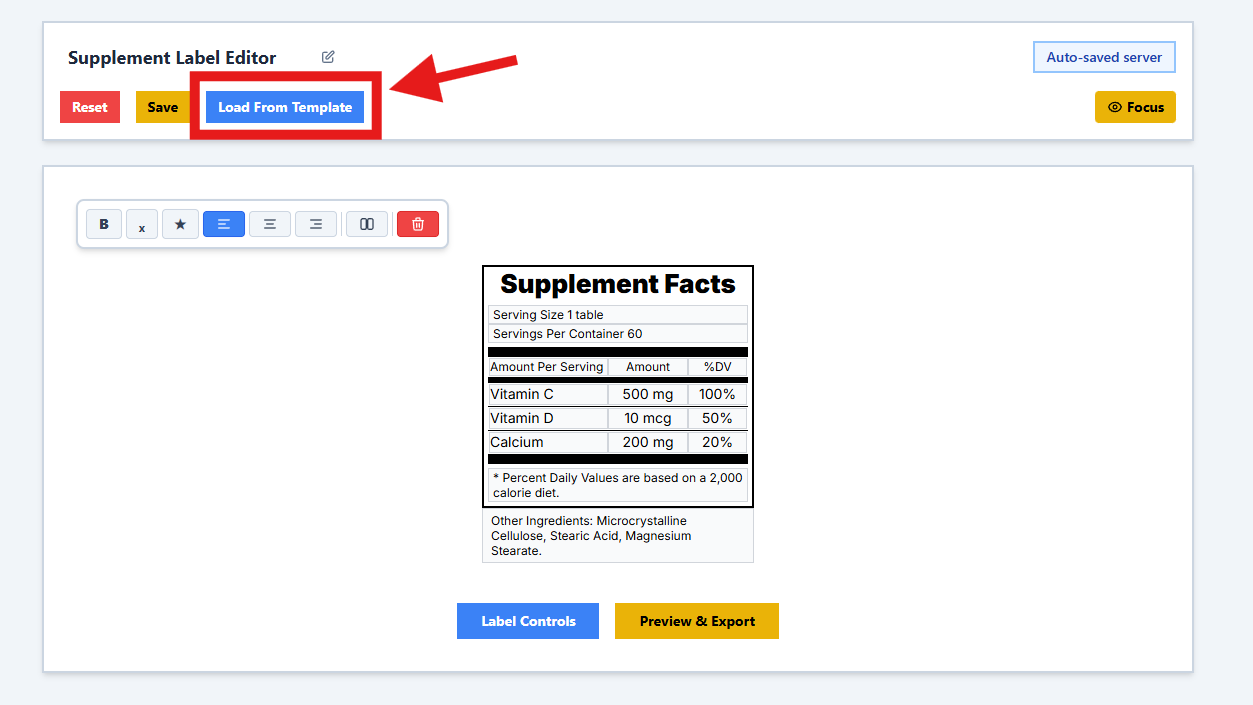
When you click "Load Template", a menu will appear showing all available template options:
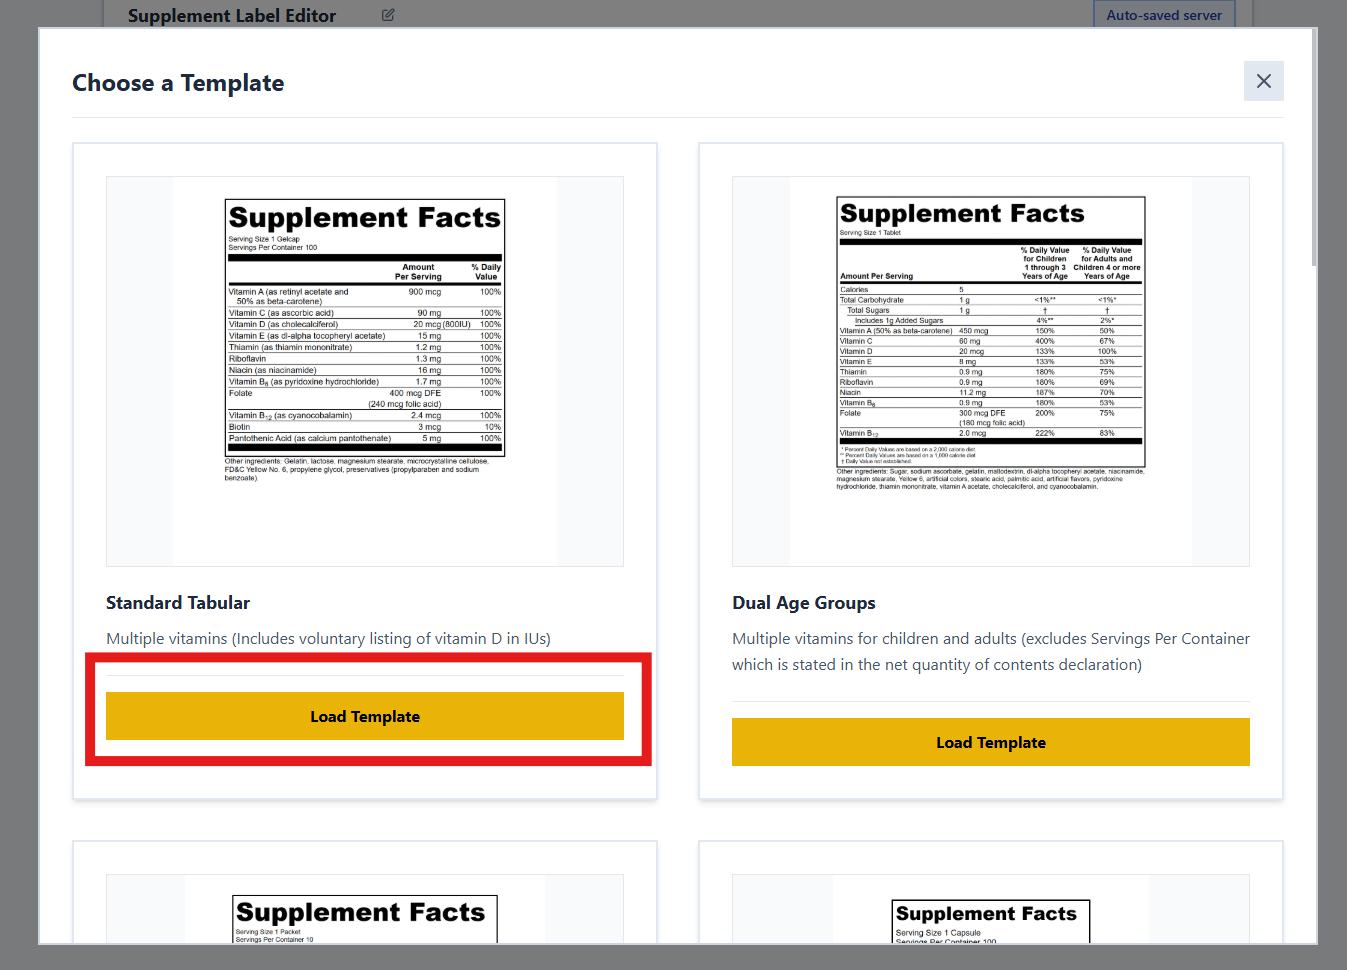
Choose from various FDA-compliant templates including Standard Tabular, Dual Column, Linear, Simplified, and more. Each template is designed to meet specific labeling requirements and layout preferences. Simply click on a template to load it into the editor.
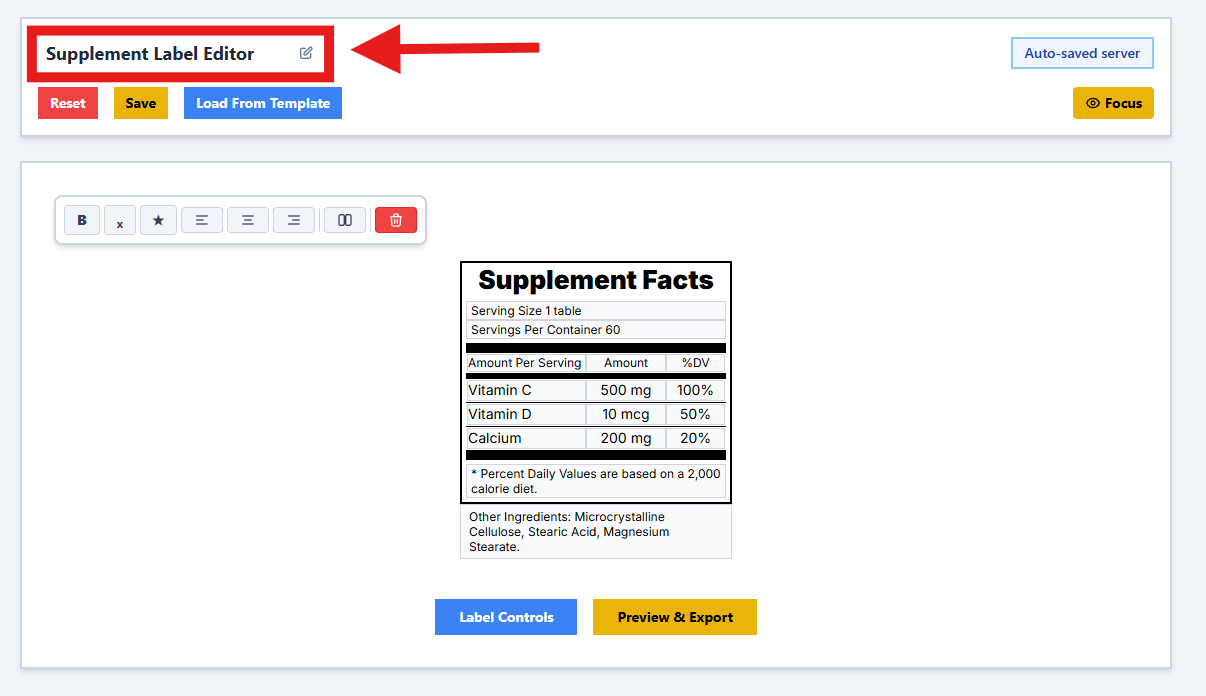
Renaming Your Project
Keep your projects organized by giving them unique names. Click on the project name in the top bar to rename it:
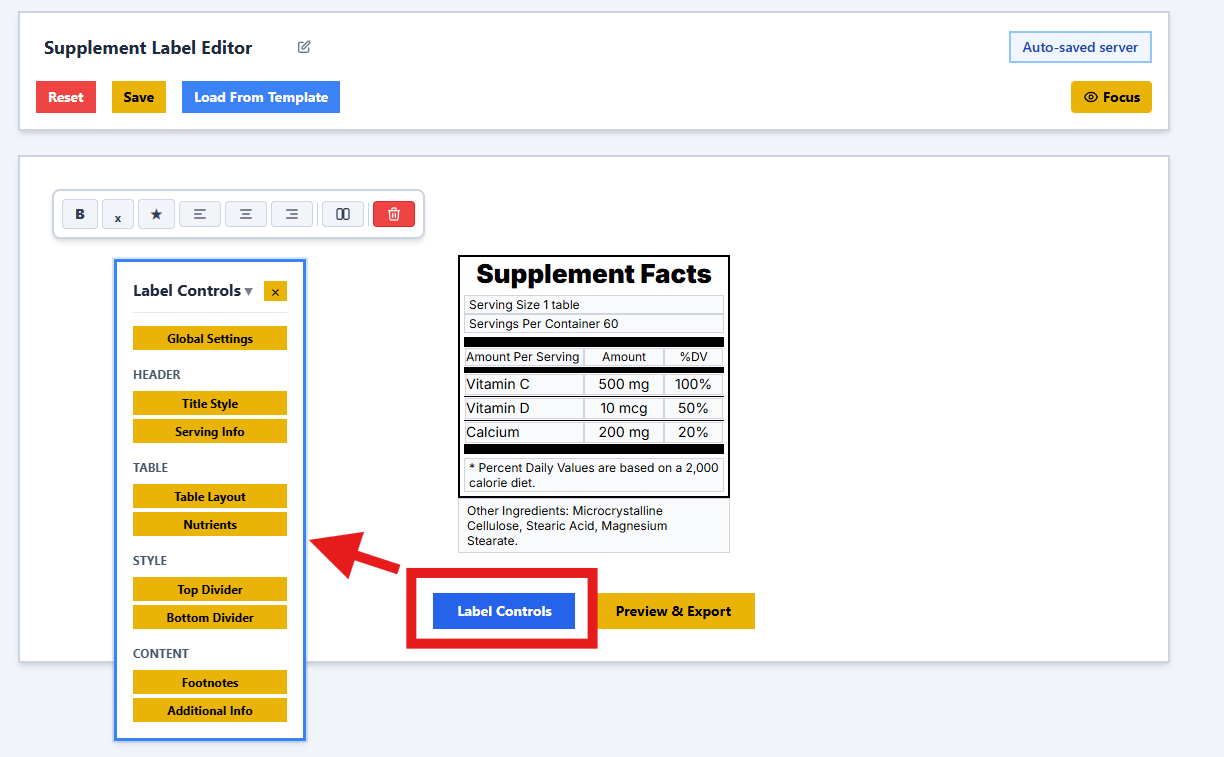
Label Controls
The Label Controls panel is your command center for customizing every aspect of your supplement fact panel.
Managing Popups
The editor uses a flexible popup system for detailed settings. These popups are designed to be unobtrusive and easy to manage:
- Draggable: Click and drag the header of any popup to move it around your workspace.
- Collapsible: Click the header to collapse a popup, keeping it accessible but out of the way.
- Closeable: Click the 'X' or use the close button to remove a popup when you're done.
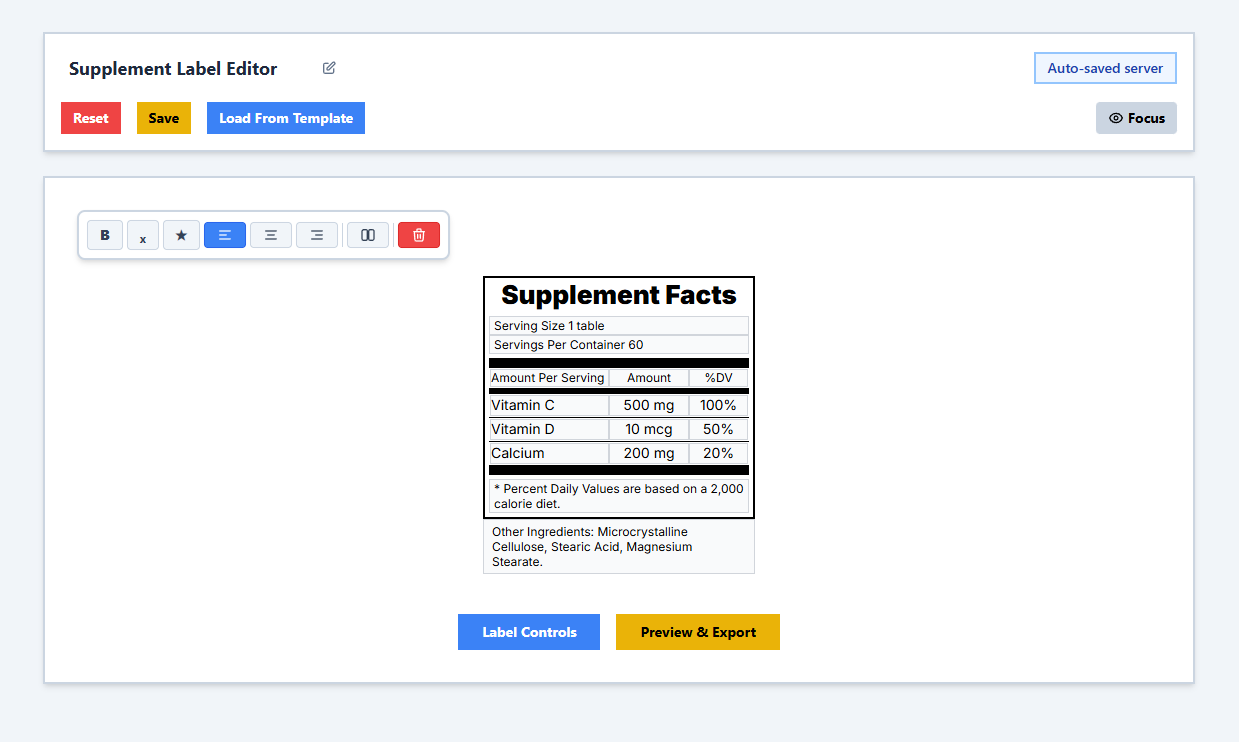
Text Formatting Toolbar
When editing text fields in your label, a rich text formatting toolbar appears, giving you precise control over text appearance:

Each numbered button provides specific formatting capabilities:
- Bold: Make text bold for emphasis.
- Subscript: Format text as subscript (e.g., H₂O). Useful for chemical formulas.
- Insert Symbol: Open a menu of special characters (e.g., †, ‡, *, etc.) to insert into your text.
- Align Left: Align text to the left side of the field.
- Align Center: Center text within the field.
- Align Right: Align text to the right side of the field.
- Split Input: Split a single text field into multiple columns for better layout control.
- Undo: Revert the last change made to the text.
- Redo: Reapply a change that was undone.
- Clear Formatting: Remove all formatting and return text to its default state.
The toolbar appears automatically when you click into any editable text field and disappears when you click outside, keeping your workspace clean and focused.
Detailed Settings
Explore the specific controls available to customize your label:
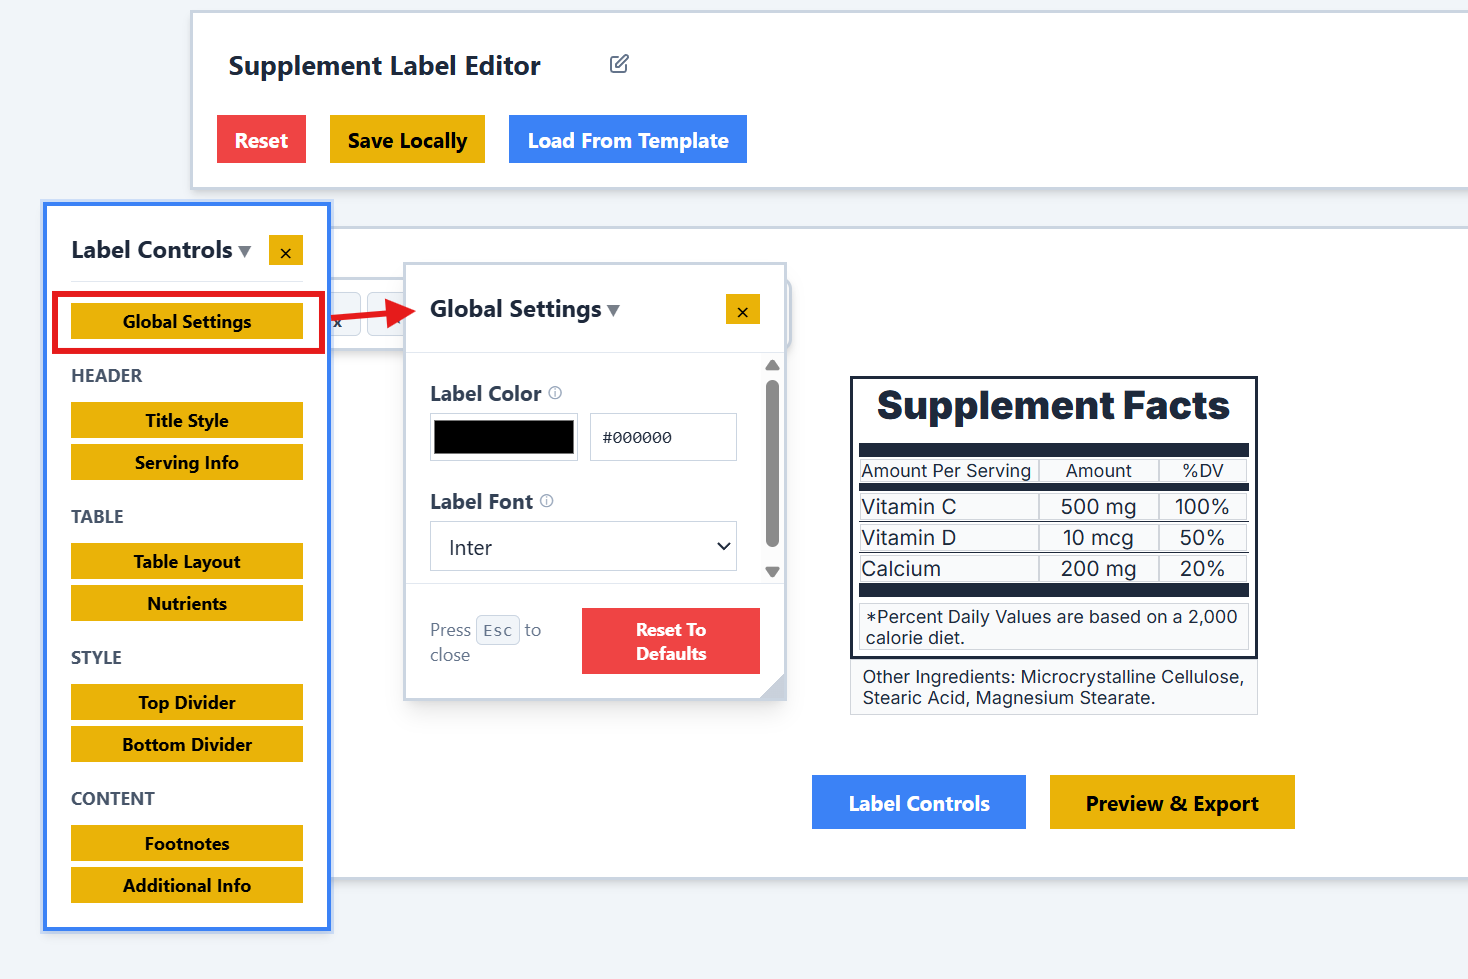
Global Settings
Configure the foundational aspects of your label, such as the overall width and font family.
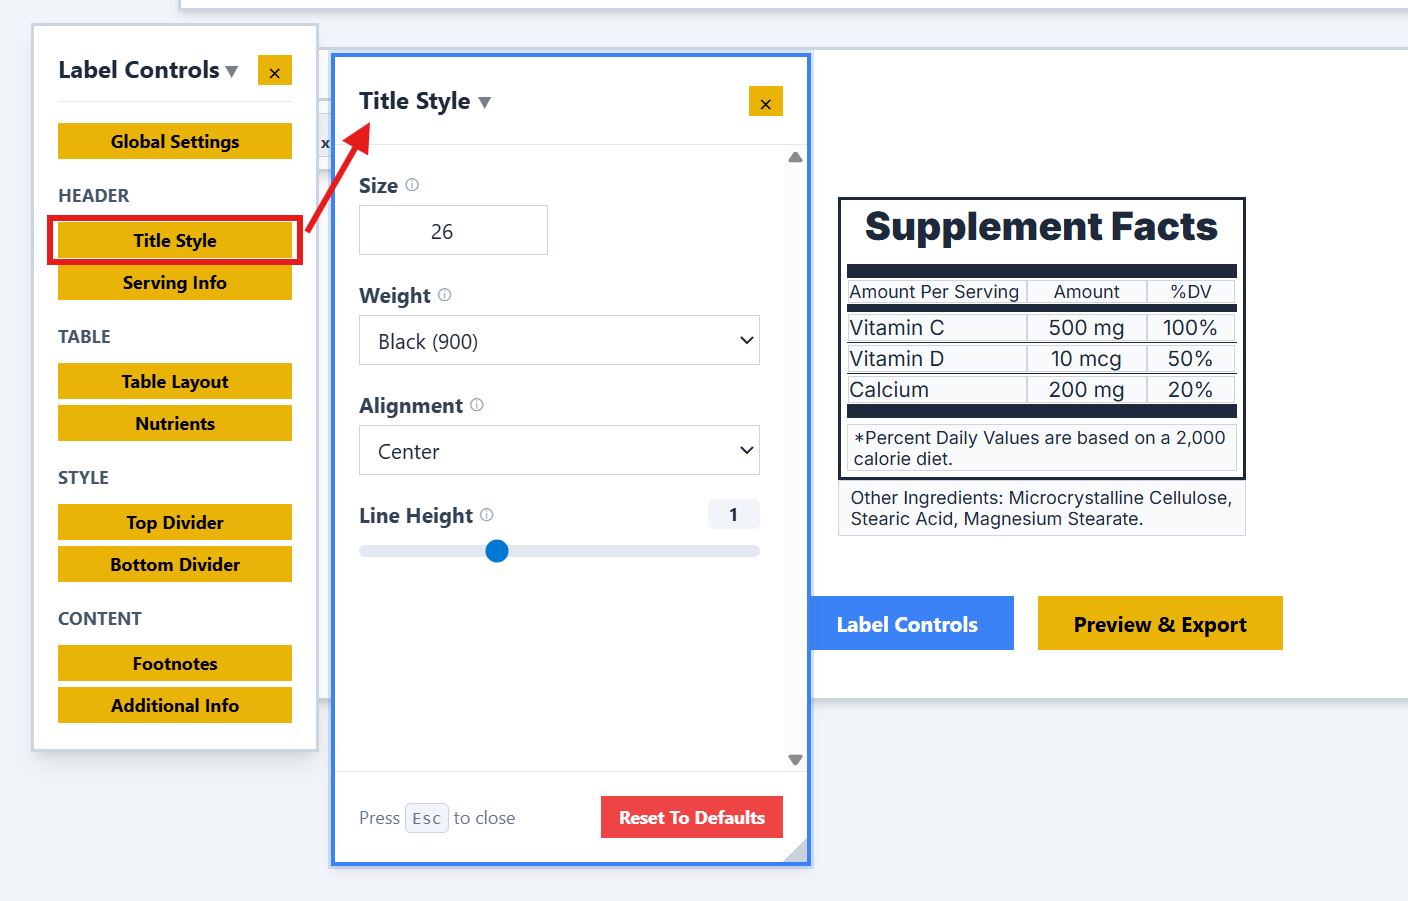
Title Style
Customize the "Supplement Facts" title. You can adjust the font size, alignment, and spacing to match your brand's style.
Serving Information
Define the serving size and servings per container to clearly communicate portion details to the consumer.

Nutrients
This is the core of your label. Add, remove, and reorder nutrients. You can specify amounts, units, and Daily Values, or create entirely custom columns using the Table Layout controls.

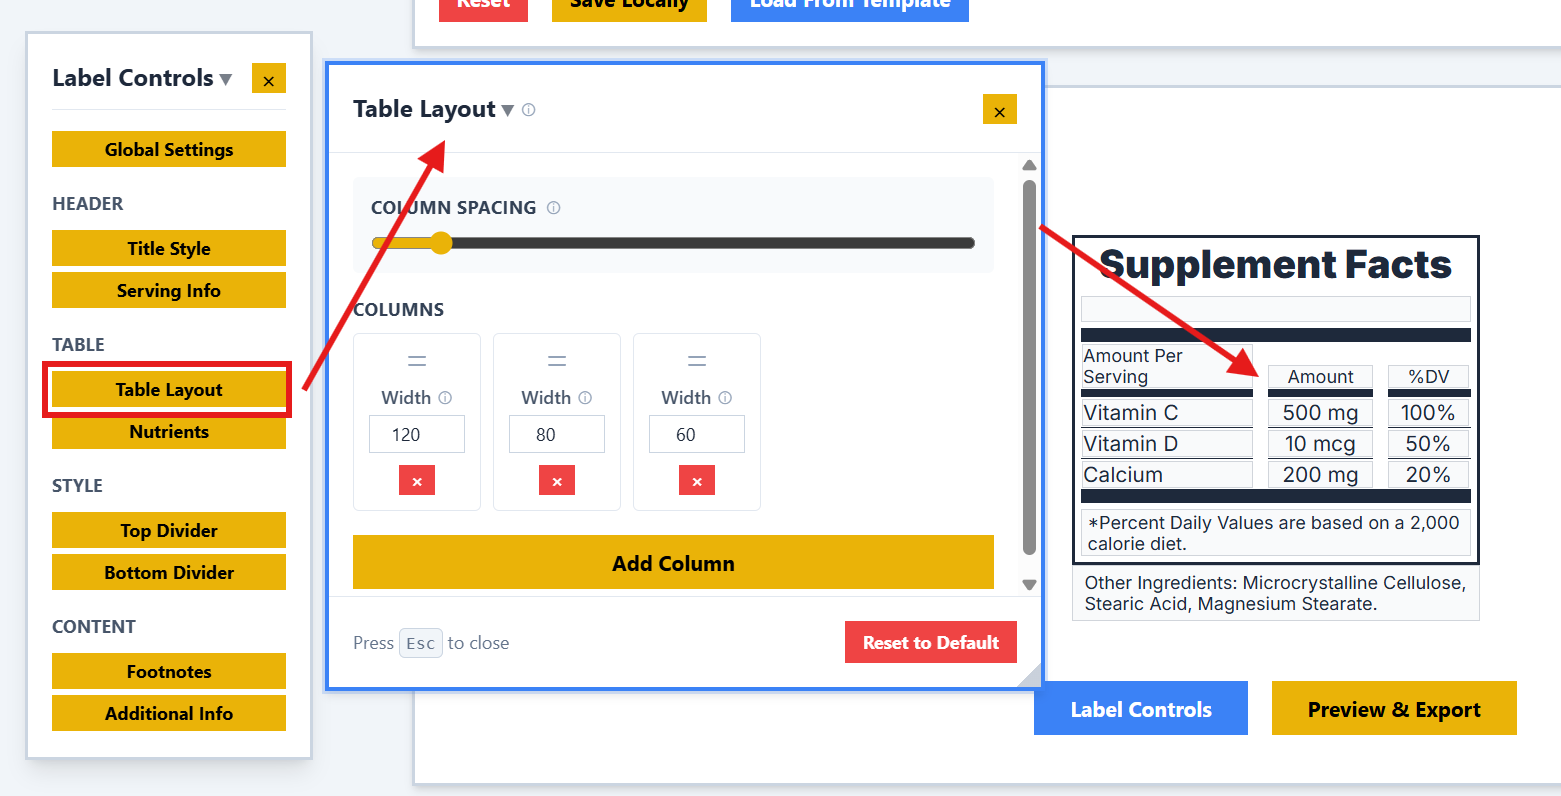
Table Layout
Fine-tune the structure of your nutrient table. Adjust column widths, spacing, and alignment to ensure maximum readability.
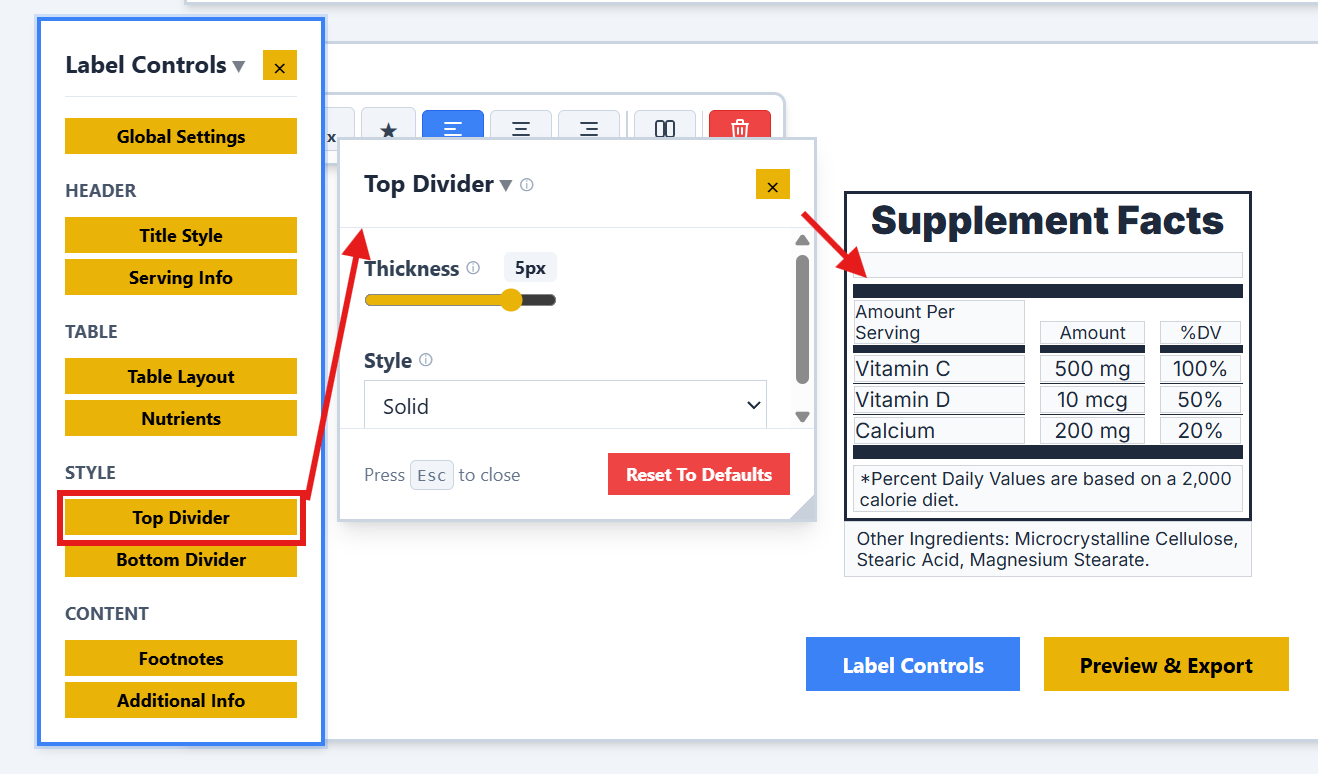
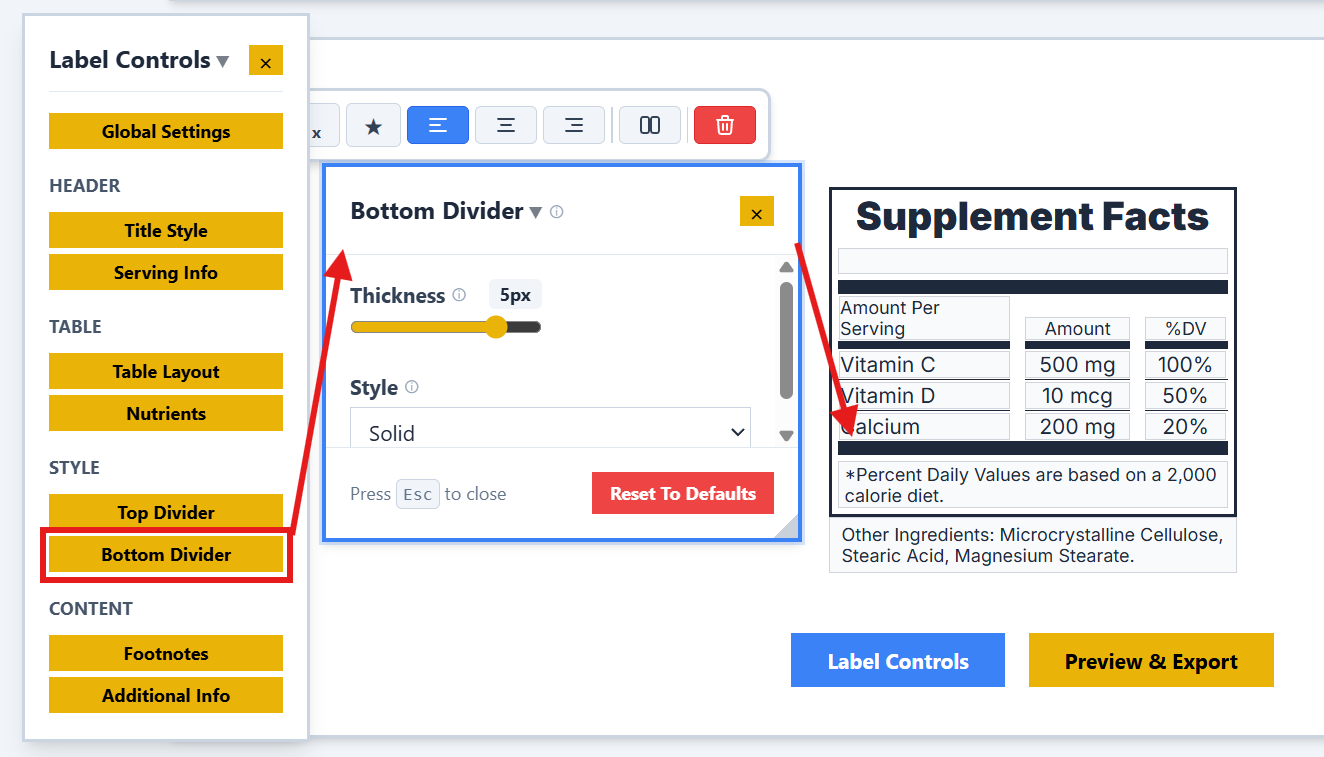
Dividers
Control the appearance of the lines separating sections of your label. You can customize the thickness and style of both top and bottom dividers.
Top Divider:
Bottom Divider:
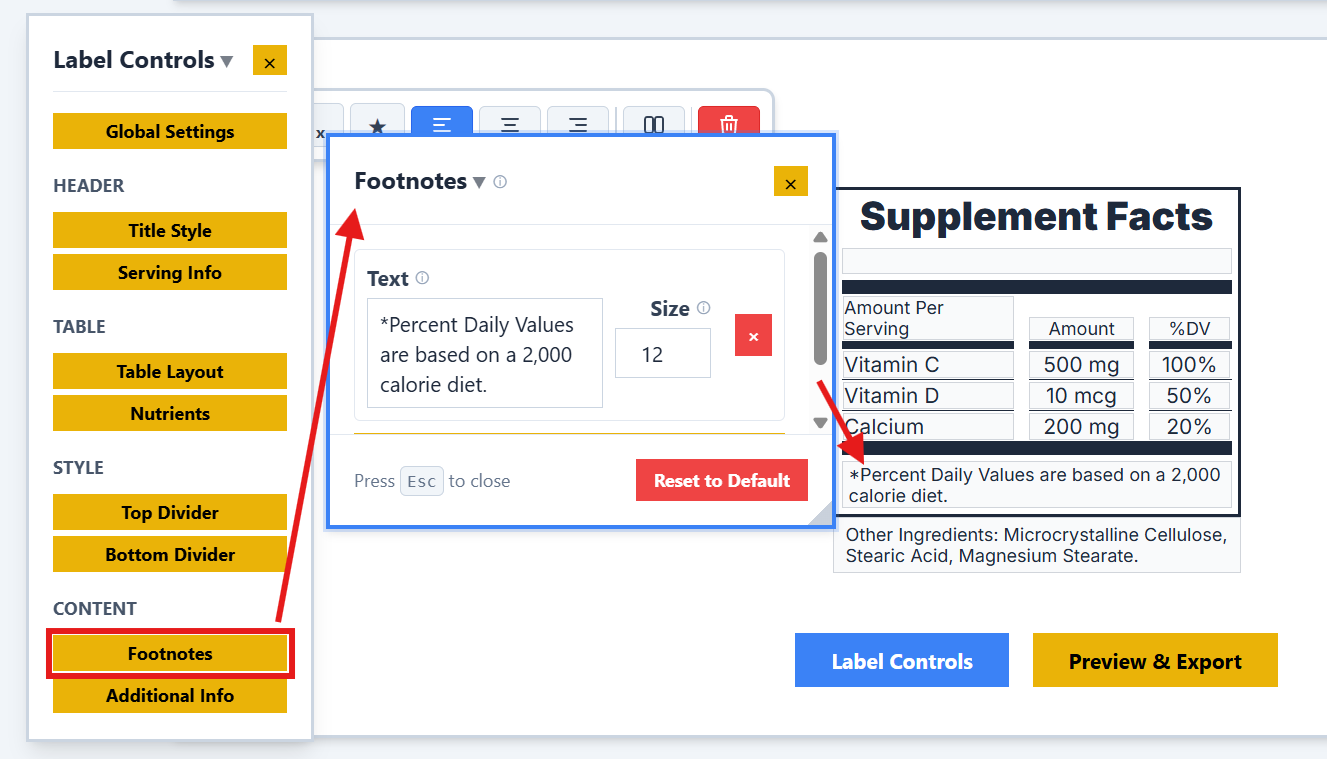
Footnotes
Add necessary footnotes to explain Daily Values or other asterisks used in your label. This ensures full compliance and clarity.
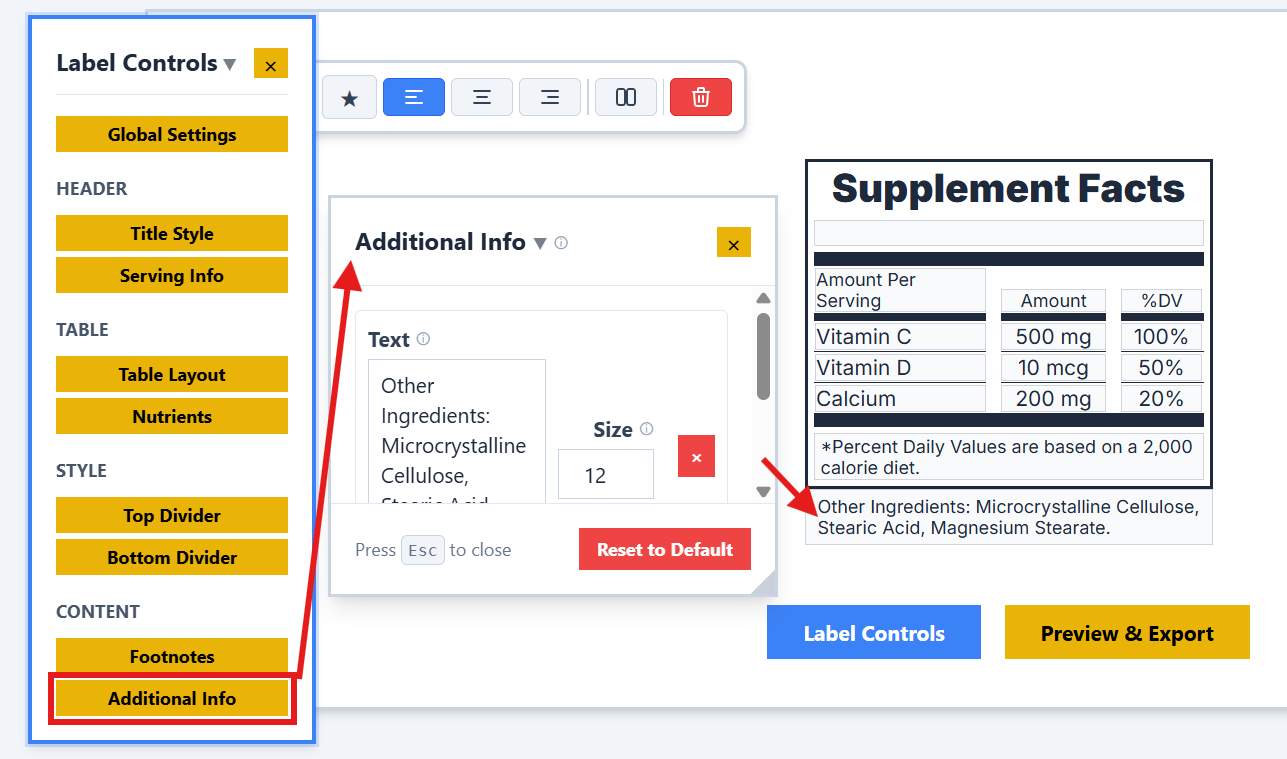
Additional Information
Include any other required text, disclaimers, or food allergens that don't fit into the standard sections.
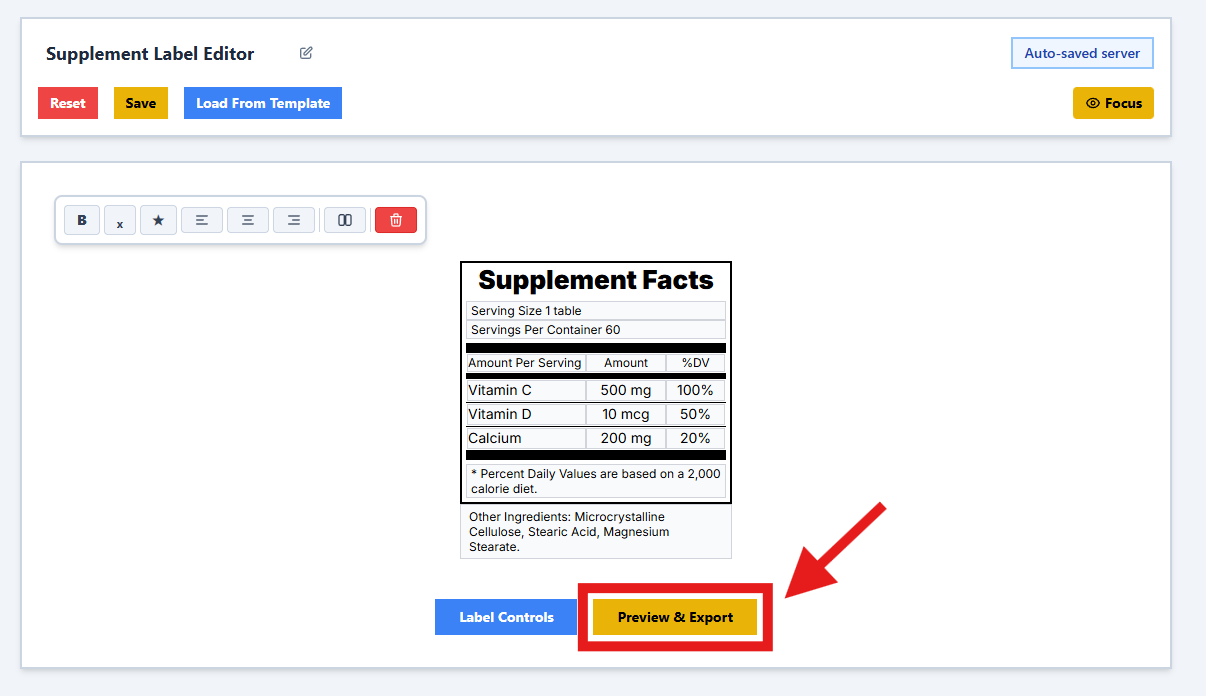
Preview and Export
See exactly how your label will look before exporting. The preview updates in real-time as you make changes.
Preview Mode
Toggle the preview to see the final rendered label without editor guides:
Editor View:
Preview View:

Exporting Your Label
When you're ready, click the Export button to save your label. You have multiple format options:
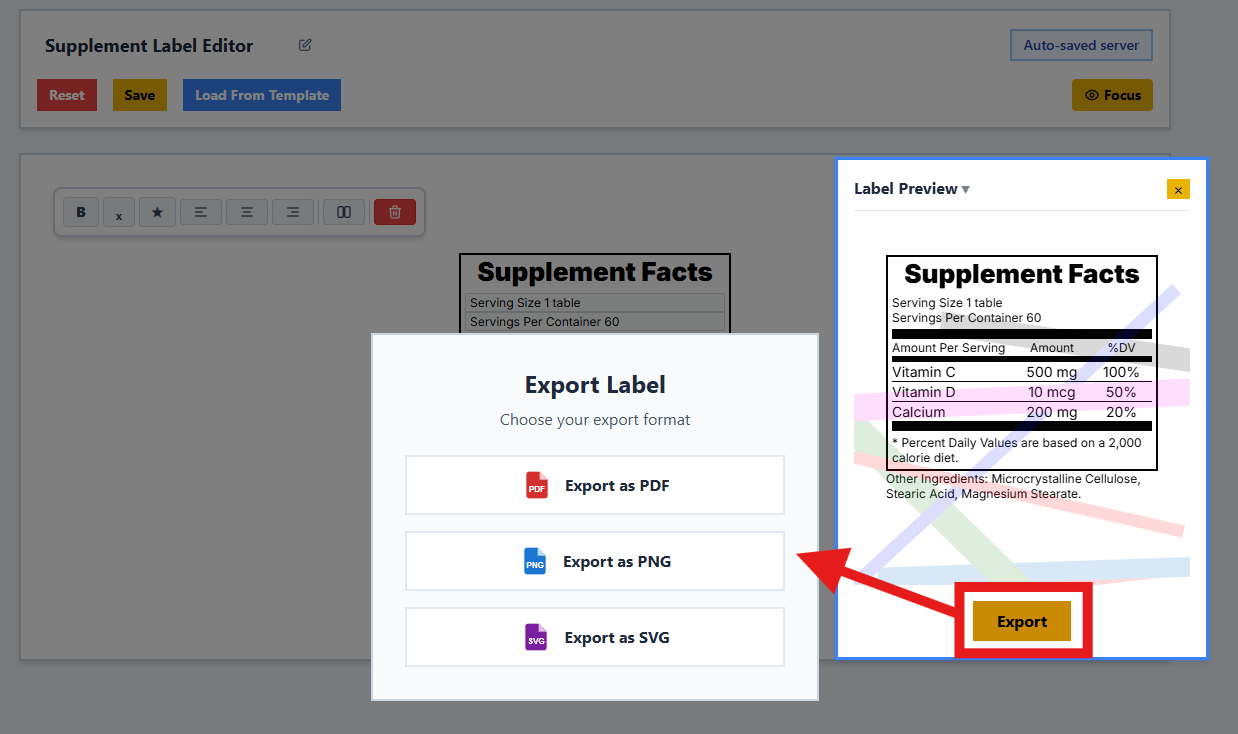
Choose from PDF, PNG, or SVG formats depending on your printing or design needs.
Need More Help?
If you have questions not covered in this guide:
- Visit our FAQ page
- Email us at purelylabelssupport@gmail.com
- Check out our Nutrition Label Guide